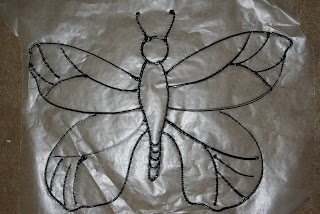
Stained Glass Butterflies!

* In this lesson students will learn about butterflies
and will be introduced to the concept of symmetry.
Symmetry: One half is the reflection- or mirror image of the other
* Students will create a stained glass butterfly painting.
Materials:
* Wax Paper
*Black Puffy Paint
*Finger Paints
*Paintbrushes
*Tissue Paper
Steps:
(1) Prepare wax paper ahead of time by drawing butterfly outlines with black puffy paint. Then let dry for a few hours or overnight
(2) Show butterfly images to students (I showed them Salvador Dali's Landscape with Butterflies and some pictures of butterflies)
(3) Students will use finger paints to paint the butterfly and add tissue paper squares.
* The kids had alot of fun painting their butterflies! As they were working I talked about symmetry and pointed out the shapes on each side.
* These pictures are from the 4-6 year olds
* And these are the 2-3 year olds!
* I told all the kids and the parents to cut out the extra wax paper around the butterfly when it is dry and hang it in the window!!
Additional Activities:
2-3 yr olds- This is a good way to show the little ones the basic idea of symmerty
(1) give each student a sheet of white paper folded in half and with a butterfly drawn on one half with black oil pastel
(2) have students refold , rub and press the paper- then open and the black line should faintly show on the other side (will add a picture later) Then trace over lines with black pastel to darken
(3) Then have students drop spoonfuls of paint on ONE side of the paper
(4) Then fold in half and press- The kids in my class loves seeing what happens with you open the paper!
4-6 yr olds- Symmetrical Butterfly
(1) Fold a piece of white paper in half
(2) Draw a butterfly with oil pastels on one half of the paper
(3) Fold and rub to transfer lines
(4) Trace over lines to darken
(5) Color butterfly with pastels, or paint and add tissue
* The kids in my class did an amazing job with this- I will add some pictures soon!


Comments
Post a Comment